comfyui接入实战
这部分比较复杂,最好先看完其他的框架教程以后再来看这个,以下教程默认你已经看过了
首先,什么是comfyui(cui)
懒得介绍了,我拜托我朋友写了个入门文档,致谢一下作者真夜永劫( https://docs.qq.com/aio/DVGpqa1NJVGpDc2RS?p=SVCt0aFWBzB1EF5bbGsRqT
大致流程
- 从comfyui导出api工作流
- 把工作流放到一个你喜欢的地方
- 用bot框架自带的接口对接
从comfyui导出api工作流
不同版本的cui可能界面不一致,但是导出基本都在左上角的图标,如图: 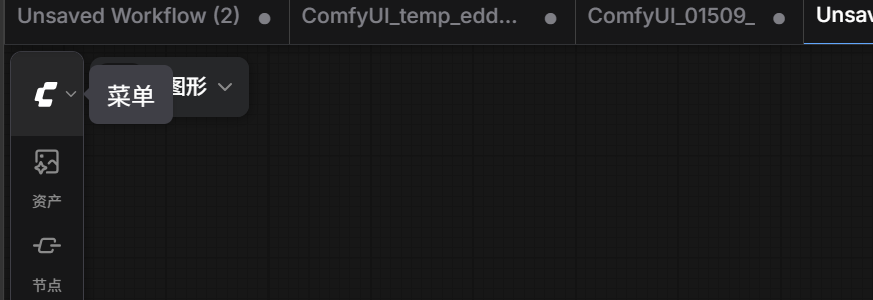
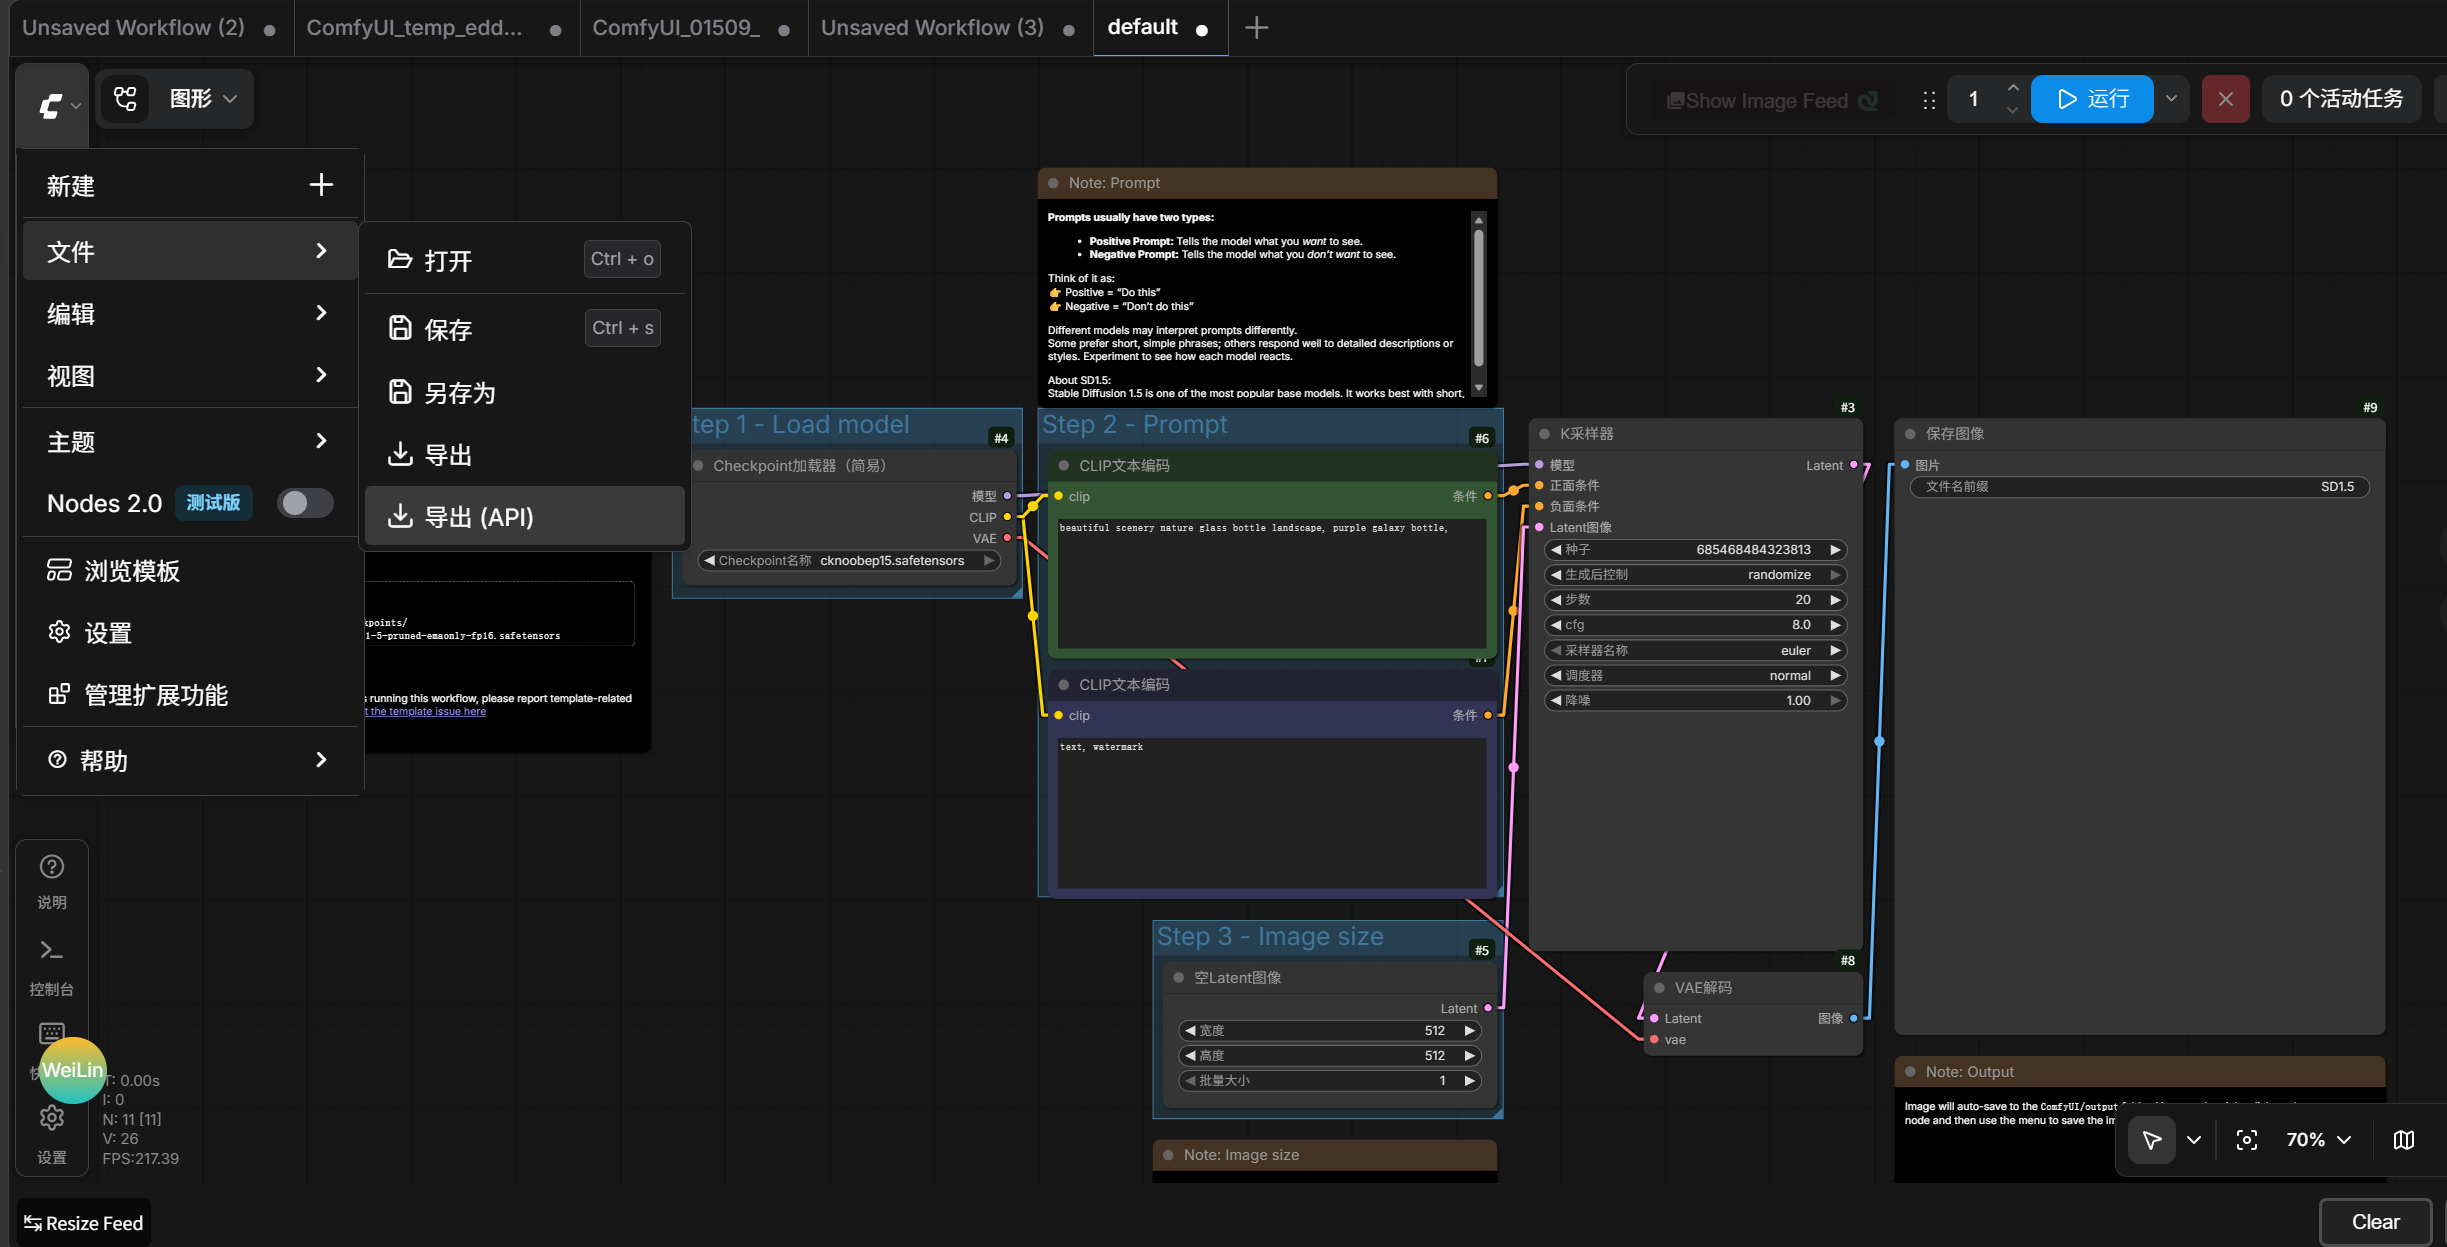
注意,一定要导出的是api工作流而不是普通工作流,获得一个json文件,以最基础的生图工作流为例,内容大概是:
{
  "3": {
    "inputs": {
      "seed": 156680208700286,
      "steps": 20,
      "cfg": 8,
      "sampler_name": "euler",
      "scheduler": "normal",
      "denoise": 1,
      "model": [
        "4",
        0
      ],
      "positive": [
        "6",
        0
      ],
      "negative": [
        "7",
        0
      ],
      "latent_image": [
        "5",
        0
      ]
    },
    "class_type": "KSampler",
    "_meta": {
      "title": "K采样器"
    }
  },
  "4": {
    "inputs": {
      "ckpt_name": "waiNSFWIllustrious_v140.safetensors"
    },
    "class_type": "CheckpointLoaderSimple",
    "_meta": {
      "title": "Checkpoint加载器(简易)"
    }
  },
  "5": {
    "inputs": {
      "width": 512,
      "height": 512,
      "batch_size": 1
    },
    "class_type": "EmptyLatentImage",
    "_meta": {
      "title": "空Latent图像"
    }
  },
  "6": {
    "inputs": {
      "text": "beautiful scenery nature glass bottle landscape, , purple galaxy bottle,",
      "clip": [
        "4",
        1
      ]
    },
    "class_type": "CLIPTextEncode",
    "_meta": {
      "title": "CLIP文本编码"
    }
  },
  "7": {
    "inputs": {
      "text": "lowres,(bad),text,error,fewer,extra,missing,worst quality,jpeg artifacts,low quality,watermark,unfinished,displeasing,oldest,early,chromatic aberration,signature,extra digits,artistic error,username,scan,[abstract],",
      "clip": [
        "4",
        1
      ]
    },
    "class_type": "CLIPTextEncode",
    "_meta": {
      "title": "CLIP文本编码"
    }
  },
  "8": {
    "inputs": {
      "samples": [
        "3",
        0
      ],
      "vae": [
        "4",
        2
      ]
    },
    "class_type": "VAEDecode",
    "_meta": {
      "title": "VAE解码"
    }
  },
  "9": {
    "inputs": {
      "filename_prefix": "ComfyUI",
      "images": [
        "8",
        0
      ]
    },
    "class_type": "SaveImage",
    "_meta": {
      "title": "保存图像"
    }
  }
}
把工作流放到一个你喜欢的地方
这个json文件我们可以随便放在一个喜欢的地方,为了结构清楚,我们把它放在run/comfyui_api/example_src下,你可以看到里面已经有几个json文件了,这些都是工作流
开始编写代码对接
comfyui相关的对接代码全部需要写在run/comfyui_api文件夹内,接下来我们开始对接上面那个json工作流,可以发现在仓库已经有一个工作流文件simple_t2i.json,我们接下来以此讲解最简单的文生图流程
固定导入
为了防止后面动脑子,我决定把可能用到的所有内置模块一次性导进来(不是好习惯,但是可以防止出错)
在代码顶部:
from developTools.event.events import GroupMessageEvent
from framework_common.framework_util.websocket_fix import ExtendBot
from framework_common.framework_util.yamlLoader import YAMLManager
import asyncio
import random
import base64
import os
from developTools.message.message_components import File, Image, Video, Node, Text
from framework_common.utils.utils import delay_recall # 撤回提示防刷屏
from run.ai_generated_art.service.setu_moderate import pic_audit_standalone # 审核

from .comfy_api.client import ComfyUIClient
from .comfy_api.workflow import ComfyWorkflow
反正不管先全部导入进来
继续编写
在代码仓库已经有了一个example_t2i_workflow.py文件,这个就是我们讲解的核心
首先定义一个api列表,也可以是字符串,列表是方便你后面轮询,里面放你的comfyui网址
COMFYUI_URLS = ["http://127.0.0.1:8188", "http://127.0.0.1:114514"]如果你装了comfyui-login插件,使用token@http://127.0.0.1:8188这种格式
定义轮询指针
# 全局索引变量:记录当前使用的服务器下标
current_server_index = 0 # 从列表里第一个网址开始
开始工作流核心替换内容逻辑
# 核心工作流逻辑
async def run_workflow(prompt, config, output_dir: str = "data/pictures/cache"):
    """
    执行工作流并获取所有预定义的输出
    """
    # 声明使用全局索引变量
    global current_server_index
    # 获取当前服务器地址
    current_server_url = COMFYUI_URLS[current_server_index]
    print(f"本次执行使用服务器: {current_server_url}")

    # 更新全局指针:轮询切换下一个服务器(循环复用)
    current_server_index = (current_server_index + 1) % len(COMFYUI_URLS)

    # 导出的api工作流JSON文件的路径
    WORKFLOW_JSON_PATH = "run/comfyui_api/example_src/simple_t2i.json"

    if not os.path.exists(WORKFLOW_JSON_PATH):
        print(f"错误: 找不到工作流文件: {WORKFLOW_JSON_PATH}"); return

    async with ComfyUIClient(current_server_url, proxy=config.common_config.basic_config["proxy"]["http_proxy"] if config.common_config.basic_config["proxy"].get("http_proxy") else None) as client:

        workflow = ComfyWorkflow(WORKFLOW_JSON_PATH)

        # 种子和上一次执行不同来返回不同结果
        if prompt != "default":
            workflow.add_replacement("6", "text", prompt)
        workflow.add_replacement("3", "seed", random.randint(0, 999999999999))

        # 4. 从节点(SaveImage) 触发默认下载,最终的输出将会是DEFAULT_DOWNLOAD键内
        workflow.add_output_node("9")

        # 一次性执行并获取所有结果
        print("\n开始执行工作流,完成后将一次性返回所有结果...")
        all_results = await client.execute_workflow(workflow, output_dir)

        print("\n工作流全部输出结果")
        # 使用json.dumps美化输出,方便查看
        #print(json.dumps(all_results, indent=2, ensure_ascii=False))
        #print("输出完毕")
return all_results重点讲解workflow = ComfyWorkflow(WORKFLOW_JSON_PATH)这个东西
在初始化一个工作流实例以后,add_replacement是很重要的内容,可以发现,我们对id为6和3的节点执行了这个替换,他们的内容分别是:
  "6": {
    "inputs": {
      "text": "beautiful scenery nature glass bottle landscape, , purple galaxy bottle,",
      "clip": [
        "4",
        1
      ]
    },
    "class_type": "CLIPTextEncode",
    "_meta": {
      "title": "CLIP文本编码"
    }
  },

和
  "3": {
    "inputs": {
      "seed": 156680208700286,
      "steps": 20,
      "cfg": 8,
      "sampler_name": "euler",
      "scheduler": "normal",
      "denoise": 1,
      "model": [
        "4",
        0
      ],
      "positive": [
        "6",
        0
      ],
      "negative": [
        "7",
        0
      ],
      "latent_image": [
        "5",
        0
      ]
    },
    "class_type": "KSampler",
    "_meta": {
      "title": "K采样器"
    }
  },
可以观察通过这两个json块的内容得到,他们分别对应的是我们cui界面中的正向提示词的CLIP文本编码节点(6号节点)和K采样器节点(3号节点)
而显然这里的text是我们想要传入来替换的,因此我们在async def run_workflow的时候传入了prompt这个项,来使用这个prompt替换原来的text项
workflow.add_replacement("6", "text", prompt)这句话代表,对6号节点中的text这个项进行值替换,把这个text的值替换为prompt
同理,我们想要每次生成返回不同的图像,就需要对种子(seed)进行随机取值
workflow.add_replacement("3", "seed", random.randint(0, 999999999999))最终我们需要获取我们想要的输出项,也就是图片,那么我们使用
workflow.add_output_node("9")这里的9号节点对应的是api工作流里的
  "9": {
    "inputs": {
      "filename_prefix": "ComfyUI",
      "images": [
        "8",
        0
      ]
    },
    "class_type": "SaveImage",
    "_meta": {
      "title": "保存图像"
    }
  }
显然对应了我们cui中的保存图像这个节点
将节点中内容注册为需要输出的方法有很多种,这个我们后面再讲,对于cui内置的保存图片节点,我们可以采用默认:
workflow.add_output_node("9")将工作流执行函数与bot消息处理器对接
async def call_simple_draw(bot, event, config, prompt): # 主调用逻辑和@bot.on分开,方便函数调用
    msg = await bot.send(event, "已发送cui绘图请求...")
    await delay_recall(bot, msg, 10)
    results = await run_workflow(prompt=prompt, config=config) # 这里返回的是一个只包含有add_output_node节点的json
    path = results.get("9", {}).get("DEFAULT_DOWNLOAD", "")
    with open(path, "rb") as image_file:
        image_data = image_file.read()
    if event.group_id not in config.ai_generated_art.config['ai绘画']['allow_nsfw_groups']: # 审核逻辑开始
        try:
            check = await pic_audit_standalone(
                base64.b64encode(image_data).decode('utf-8'),
                return_none=True,
                url=config.ai_generated_art.config['ai绘画']['sd审核和反推api']
            )
        except:
            msg = await bot.send(event, "未配置审核api或api故障,为保证安全已禁止发送", True)
            await delay_recall(bot, msg, 10)
            return
        if check:
            msg = await bot.send(event, "杂鱼,色图不给你!", True)
            await delay_recall(bot, msg, 10)
            return # 审核逻辑结束,如果不想要审核可以把审核逻辑开始到这一行都删了
    await bot.send(event, [Text("cui结果:"), Image(file=path)], True)

def main(bot: ExtendBot,config: YAMLManager):
    @bot.on(GroupMessageEvent)
    async def handle_group_message(event: GroupMessageEvent):
        if event.pure_text.startswith("#cui "): # 触发指令前缀
            prompt = event.pure_text.replace("#cui ","")
            await call_simple_draw(bot, event, config, prompt)
定义一个call函数,传入bot, event, config, xxx1, xxx2, xxx3...
其中这里的前三项bot, event, config是函数调用必须的,xxx1,xxx2...这种代表工作流需要从外部获取的信息
现在你在聊天里发送#cui 1girl就可以触发cui调用画图了
进阶,如果我想要图生图呢?
如果我们需要进行图生图,则必须从聊天里面获取到图片文件、下载保存到本地,再上传到 ComfyUI 工作流中
图生图和文生图的核心区别:
- 需要监听用户发送的图片(聊天内图片)
- 需要下载图片到本地(统一目录:data/pictures/cache)
- 需要用户独立缓存(防止多用户消息混乱)
- 需要修改工作流(替换空 latent 节点为加载图片节点)
- 使用指令式交互:#cui2img 开启 → 发图 / 发提示词 → #ok 提交 → #clear 清空 → #view 查看
我建议参考一下更加成熟的实现,比如run/ai_generated_art/aiDraw.py和run/ai_generated_art/gemini_nano_banana.py的重绘监听器实现,下面是一个简单的代码,没有经过验证的,如果有报错自己去看run/ai_generated_art/aiDraw.py和run/ai_generated_art/gemini_nano_banana.py的实现,我懒得改了()
先准备全局用户缓存
用于区分每个用户的提示词、图片路径,互不干扰
# 全局用户缓存:按 user_id 存储提示词与图片路径
user_cache = {}

# 初始化用户缓存结构
def init_user_cache(user_id: int):
    if user_id not in user_cache:
        user_cache[user_id] = {
            "active": False,      # 是否监听中
            "prompt": "",         # 提示词
            "image_path": ""      # 本地图片路径
        }
编写纯图生图工作流 run_workflow 函数
注意:这个函数只用于图生图,不包含文生图逻辑
async def run_img2img_workflow(prompt, image_path, config, output_dir: str = "data/pictures/cache"):
    global current_server_index
    current_server_url = COMFYUI_URLS[current_server_index]
    print(f"本次执行使用服务器: {current_server_url}")
    current_server_index = (current_server_index + 1) % len(COMFYUI_URLS)

    # 图生图工作流(必须包含 LoadImage 节点)
    WORKFLOW_JSON_PATH = "run/comfyui_api/example_src/simple_img2img.json"

    if not os.path.exists(WORKFLOW_JSON_PATH):
        print(f"错误: 找不到工作流文件: {WORKFLOW_JSON_PATH}")
        return

    async with ComfyUIClient(
        current_server_url,
        proxy=config.common_config.basic_config["proxy"]["http_proxy"] if config.common_config.basic_config["proxy"].get("http_proxy") else None
    ) as client:

        workflow = ComfyWorkflow(WORKFLOW_JSON_PATH)

        # 替换提示词
        workflow.add_replacement("6", "text", prompt)

        # 随机种子
        workflow.add_replacement("3", "seed", random.randint(0, 999999999999))

        # 图生图核心:上传图片
        # 上传本地图片到 ComfyUI 服务器
        upload_info = await client.upload_file(image_path)
        server_filename = upload_info['name']

        # 替换 LoadImage 节点(10 是你json工作流文件中 LoadImage 节点 ID,注意一定要检查)
        workflow.add_replacement("10", "image", server_filename)

        # 输出节点
        workflow.add_output_node("9")

        all_results = await client.execute_workflow(workflow, output_dir)
        return all_results
编写图生图监听 call 函数
async def call_img2img_listen(bot, event, config):
    user_id = event.sender.user_id
    init_user_cache(user_id)
    cache = user_cache[user_id]

    # 开启监听
    cache["active"] = True
    cache["prompt"] = ""
    cache["image_path"] = ""

    tip = await bot.send(event, Text(
        "已进入 ComfyUI 图生图模式\n"
        "请发送:提示词 + 1张底图\n"
        "#ok 提交 | #clear 清空退出 | #view 查看缓存"
    ), True)
    await delay_recall(bot, tip, 15)

    while cache["active"]:
        try:
            resp = await bot.wait_for(
                "group_message",
                check=lambda e: e.sender.user_id == user_id and e.group_id == event.group_id,
                timeout=180
            )
        except asyncio.TimeoutError:
            await bot.send(event, Text("等待超时,已自动退出"), True)
            cache["active"] = False
            break

        r_text = str(resp.pure_text).strip()

        # #view 查看缓存
        if r_text == "#view":
            view_msg = [Text("图生图输入")]
            view_msg.append(Text(f"提示词:{cache['prompt'] or '未设置'}\n"))
            view_msg.append(Text(f"底图:{'已上传' if cache['image_path'] else '未上传'}\n"))
            if cache["image_path"]:
                view_msg.append(Image(file=cache["image_path"]))
            msg = await bot.send(event, view_msg, True)
            await delay_recall(bot, msg, 25)
            continue

        # #clear 清空并退出
        if r_text == "#clear":
            cache["prompt"] = ""
            cache["image_path"] = ""
            cache["active"] = False
            await bot.send(event, Text("已清空缓存并退出监听"), True)
            continue

        # #ok 提交生成
        if r_text == "#ok":
            if not cache["prompt"]:
                err = await bot.send(event, Text("请先输入提示词!"), True)
                await delay_recall(bot, err, 10)
                continue
            if not cache["image_path"]:
                err = await bot.send(event, Text("请先发送底图!"), True)
                await delay_recall(bot, err, 10)
                continue

            await bot.send(event, Text("已提交,正在生成图片..."), True)
            cache["active"] = False

            # 执行纯图生图工作流
            results = await run_img2img_workflow(
                prompt=cache["prompt"],
                image_path=cache["image_path"],
                config=config
            )

            path = results.get("9", {}).get("DEFAULT_DOWNLOAD", "")
            if not path or not os.path.exists(path):
                await bot.send(event, Text("生成失败,未获取到图片"), True)
                return

            # 审核逻辑
            with open(path, "rb") as f:
                img_data = f.read()
            if event.group_id not in config.ai_generated_art.config['ai绘画']['allow_nsfw_groups']:
                try:
                    check = await pic_audit_standalone(
                        base64.b64encode(img_data).decode('utf-8'),
                        return_none=True,
                        url=config.ai_generated_art.config['ai绘画']['sd审核和反推api']
                    )
                except:
                    msg = await bot.send(event, "审核API故障,已禁止发送", True)
                    await delay_recall(bot, msg, 10)
                    return
                if check:
                    msg = await bot.send(event, "杂鱼,色图不给你!", True)
                    await delay_recall(bot, msg, 10)
                    return

            await bot.send(event, [Text("cui图生图结果:"), Image(file=path)], True)
            continue

        # 接收图片并下载到本地
        try:
            from framework_common.utils.utils import get_img, download_img
            img_url = await get_img(resp, bot)
            if img_url:
                save_dir = "data/pictures/cache"
                os.makedirs(save_dir, exist_ok=True)
                img_name = f"{user_id}_{random.randint(0, 999999)}.png"
                img_path = os.path.join(save_dir, img_name)

                proxy = config.common_config.basic_config["proxy"]["http_proxy"]
                await download_img(img_url, img_path, proxy=proxy)

                cache["image_path"] = img_path
                ok = await bot.send(event, Text("图片已保存到本地"), True)
                await delay_recall(bot, ok, 10)
                continue
        except Exception as e:
            await bot.send(event, Text(f"图片处理失败:{str(e)}"), True)
            continue

        # 接收提示词
        if r_text and not r_text.startswith("#"):
            cache["prompt"] = r_text
            ok = await bot.send(event, Text("提示词已保存"), True)
            await delay_recall(bot, ok, 10)
            continue
在 main 函数中注册图生图指令
def main(bot: ExtendBot, config: YAMLManager):
    @bot.on(GroupMessageEvent)
    async def handle_group_message(event: GroupMessageEvent):
        pure_text = event.pure_text.strip()

        # 图生图指令
        if pure_text == "#cui2img":
            await call_img2img_listen(bot, event, config)
上述实现了
- 发送 #cui2img 进入图生图模式
- 发送提示词
- 发送底图
- 发送 #view 查看内容
- 发送 #ok 开始生成
- 发送 #clear 清空并退出
进阶,如何接入函数调用
进入run/comfyui_api/__init__.py
这里给个示例
plugin_description="comfyui-api"

from framework_common.framework_util.main_func_detector import load_main_functions
entrance_func=load_main_functions(__file__)

dynamic_imports = {   #写明函数的导入路径,以及函数名
    "run.comfyui_api.example_t2i_workflow": # 这个example_t2i_workflow.py是我们刚才创建的文件
        ["call_simple_draw"]
}
function_declarations=[    #声明函数
    {
    "name": "call_simple_draw",
    "description": "根据文本生成图片,即画图功能。",
    "parameters": {
        "type": "object",
        "properties": {
            "prompt": {
                "type": "string",
                "description": "生成图片的提示词。如果原始提示词中有中文,则需要你把它们替换为对应英文,尽量使用词组,单词来进行描述,并用','来分割。可通过将词语x变为(x:n)的形式改变权重,n为0-1之间的浮点数,默认为1,为1时则无需用(x:1)的形式而是直接用x。例如,如果想要增加“猫”(也就是cat)的权重,则可以把它变成(cat:1.2)或更大的权重,反之则可以把权重变小。你需要关注不同词的重要性并给于权重,正常重要程度的词的权重为1,为1时则无需用(x:1)的形式而是直接用x。例如,想要画一个可爱的女孩则可输出1girl,(cute:1.2),bright eyes,smile,casual dress,detailed face,natural pose,soft lighting;想要更梦幻的感觉则可输出1girl,ethereal,floating hair,magical,sparkles,(dreamy:1.5),soft glow,pastel colors;想要未来风格则可输出1girl,(futuristic:1.3),neon lights,(cyber:1.2),hologram effects,(tech:1.5),clean lines,metallic;同时当输入中含有英文或用户要求保留时,要保留这些词"
            }
        },
        "required": [
            "prompt"
        ]
    }
},
]由于run/ai_generated_art/__init__.py中已经有了另外一个ai画图函数调用的定义"name": "call_text2img",所以如果要开cui的为了不冲突建议把那个init文件里的call_text2img的定义删掉
进阶,非默认图片保存节点的输出内容获取
这里有个小技巧,可以通过访问你的comfyui网址/history这个网址(例如http://127.0.0.1:8188/history)来查看你工作流运行会输出的完整json内容,从而来选取你需要add_output_node的节点(在网址最底下的是最新的执行结果,越下面越新)
例如这是一个wan视频生成工作流的输出的完整json
    "118": {
        "images": [
            {
                "filename": "ComfyUI_00049_.png",
                "subfolder": "",
                "type": "output"
            }
        ]
    },
    "102": {
        "text": [
            "896"
        ]
    },
    "69": {
        "text": [
            "101x608x896"
        ]
    },
    "127": {
        "images": [
            {
                "filename": "ComfyUI_00001_.mp4",
                "subfolder": "video",
                "type": "output"
            }
        ],
        "animated": [true]
    },
    "125": {
        "images": [
            {
                "filename": "ComfyUI_temp_ygoyd_00007_.png",
                "subfolder": "",
                "type": "temp"
            }
        ]
    },
    "60": {
        "gifs": [
            {
                "filename": "WanVideo2_2_I2V_00025.mp4",
                "subfolder": "",
                "type": "output",
                "format": "video/h264-mp4",
                "frame_rate": 16,
                "workflow": "WanVideo2_2_I2V_00025.png",
                "fullpath": "/root/autodl-tmp/ComfyUI/output/WanVideo2_2_I2V_00025.mp4"
            }
        ]
    },
    "101": {
        "text": [
            "608"
        ]
    }
下面是一些add_output_node的用法:
# 1. 从节点 "60" (VHS_VideoCombine) 获取 "gifs" 列表中的所有文件
#    这将触发默认下载行为(只下载文件),因为我们没有指定更深层的选择器
workflow.add_output_node("60", "gifs")

# 2. 从节点 "69" (GetImageSizeAndCount) 获取拼接后的尺寸文本
workflow.add_output_node("69", "text[0]")

# 3. 从节点 "101" 和 "102" (easy showAnything) 获取文本
workflow.add_output_node("101", "text[0]")
workflow.add_output_node("102", "text[0]")

# 4. 从节点 "118" (SaveImage) 触发默认下载
workflow.add_output_node("118")

# 5. 从节点 "125" (PreviewImage) 下载临时文件
workflow.add_output_node("125", "images")

# 6. 从节点 "127" (SaveVideo) 下载最终视频,并测试一个无效路径
workflow.add_output_node("127", [
    "images",                # 有效:下载视频文件
    "animated[0]",           # 有效:获取布尔值
    "animated[99]"           # 无效:测试索引越界
])
这样一来,最终run_workflow函数返回的json会是这样的一个内容:
{
    "60": {
        "gifs": "D:/Downloads/comfy-api-backup/outputs/output/WanVideo2_2_I2V_00031.mp4"
    },
    "69": {
        "text[0]": "101x608x896"
    },
    "101": {
        "text[0]": "608"
    },
    "102": {
        "text[0]": "896"
    },
    "118": {
        "DEFAULT_DOWNLOAD": "D:/Downloads/comfy-api-backup/outputs/output/ComfyUI_00054_.png"
    },
    "125": {
        "images": "D:/Downloads/comfy-api-backup/outputs/temp/ComfyUI_temp_ygoyd_00012_.png"
    },
    "127": {
        "images": "D:/Downloads/comfy-api-backup/outputs/output/ComfyUI_00007_.mp4",
        "animated[0]": "True",
        "animated[99]": "指定的JSON路径不存在"
    }
}
然后你就可以通过解析这个run_workflow返回的json来处理不同类型的输出了